What To Do Immediately After Water Damage
A step-by-step emergency guide covering safety, water removal, drying, insurance documentation, and mold prevention.
Immediate action prevents mold growth, structural deterioration, and insurance complications after water damage. The first steps after water damage include ensuring electrical safety, stopping the water source, documenting damage, removing standing water, and starting the drying process. Fast response determines whether damage remains manageable or becomes catastrophic.
What Should You Do First When Water Damage Occurs?
The first action after discovering water damage is ensuring safety by shutting off electricity and evaluating evacuation needs. Electrical shock from water-damaged circuits kills within seconds. Turn off the main circuit breaker before entering areas with standing water.
Evaluate structural stability and contamination level. Evacuate immediately if ceilings sag, floors buckle, or sewage is present.
Is It Safe to Enter a Flooded Room?
No, entering a flooded room before shutting off electricity creates fatal electrocution risk. Standing water conducts electricity from damaged outlets, appliances, and wiring. Electrical shock in water causes instant cardiac arrest.
Shut off the main circuit breaker from outside the flooded area. Inspect ceilings for sagging drywall that indicates collapse risk.
Call emergency services for structural concerns or deep flooding exceeding 6 inches.
Should You Turn Off Electricity Before Dealing With Water Damage?
Yes, turning off electricity at the main breaker is essential before entering any area with standing water. Water conducts electricity through floors, walls, and furnishings. Live electrical current in flooded areas causes fatal electrocution.
Locate the main electrical panel and shut off power to affected areas. Call a licensed electrician if the panel is located in the flooded zone.
Once initial safety and source control steps are complete, professional water damage restoration teams deploy commercial-grade extraction equipment and industrial dehumidifiers that remove moisture at rates household tools cannot achieve, reducing drying time from weeks to days.
How Do You Stop Water Damage from Spreading?
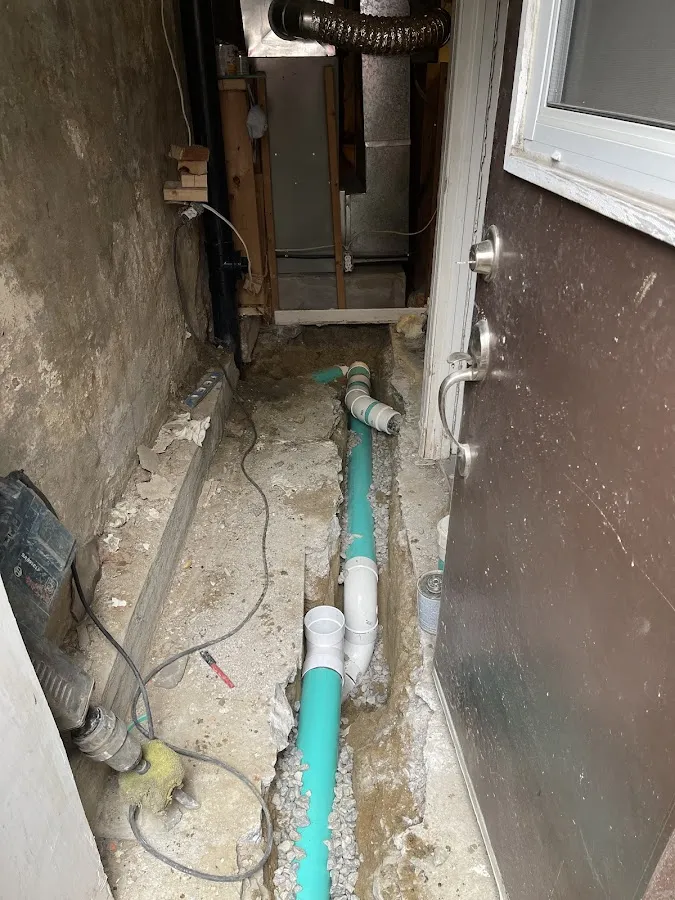
Stopping water damage requires locating and shutting off the water source at the main supply valve or affected fixture. The main water shutoff valve controls all water entering the property. Turn the valve clockwise until water flow stops completely.
Fixture-level shutoff valves control individual sinks, toilets, and appliances. Burst pipes require main valve shutoff plus pipe isolation. Appliance leaks require disconnecting water supply lines.
Roof leaks require temporary tarps or containers until repairs occur. Sewer backups require avoiding plumbing use and calling professionals immediately.
Where Is the Main Water Shutoff Valve Located?
The main water shutoff valve is typically located where the municipal water line enters the building, often in the basement near the front foundation wall. Check within 3-5 feet of where the water meter sits. Basements position valves along exterior walls.
Crawl spaces house valves near the main entry point. Utility closets in slab-foundation homes contain shutoff valves.
Identify this valve location before emergencies occur. Tag the valve with bright tape for quick identification during crisis situations.
What Should You Do If You Cannot Find the Water Source?
If you cannot locate the water source within 5 minutes, shut off the main water supply immediately and call a licensed plumber. Hidden leaks behind walls, under floors, or in ceilings require professional detection equipment. Thermal imaging cameras identify moisture sources inside wall cavities. Continuing water flow multiplies damage exponentially every hour.
Toronto's variable humidity and seasonal temperature swings affect how quickly water damage escalates, and homeowners needing water damage restoration in Toronto benefit from local technicians who factor these conditions into extraction and drying protocols.
What Is the Complete Water Damage Response Sequence?
The 6 critical steps in the complete water damage response sequence include safety assessment, source control, documentation, water removal, drying initiation, and professional evaluation.
Ensure electrical safety
Evaluate evacuation needs based on water depth, contamination, and structural stability.
Shut off the water source
Turn off the main valve or affected fixture to prevent additional water entry and damage escalation.
Document all damage
Take photos, videos, and written inventory before moving or removing items for insurance claims.
Remove standing water
Use pumps, wet/dry vacuums, or mops depending on water volume and depth in affected areas.
Start the drying process
Run fans, dehumidifiers, and ventilation within 24 hours to prevent mold growth on wet materials.
Contact your insurance company
Assess professional restoration needs based on damage extent, contamination level, and available equipment.
This sequence maintains safety, preserves insurance eligibility, and minimizes permanent damage when executed within the 24-hour critical window.
After completing initial emergency response, understanding typical restoration timelines and phases helps property owners plan recovery logistics and set realistic expectations for when each stage of the restoration process will conclude.
When Should You Call Professional Water Damage Restoration?
After completing initial safety and source control steps, professional water damage restoration becomes necessary when water volume exceeds DIY capacity, contamination is present, or structural damage is visible. Professional restoration equipment extracts 10-20 times more water than household vacuums. Commercial dehumidifiers dry structures in days rather than weeks.
Gray water from appliances requires disinfection protocols beyond household cleaning products. Black water from sewage contains pathogens requiring hazmat-certified handling.
Structural damage including ceiling sag, wall bulging, or floor buckling indicates hidden damage requiring expert assessment. Insurance companies often require professional documentation for claims exceeding certain thresholds.
Does Insurance Cover Professional Water Damage Restoration?
Yes, homeowners insurance typically covers professional water damage restoration when damage results from sudden and accidental events like burst pipes or appliance malfunctions. Policies exclude gradual damage from long-term leaks or maintenance neglect. Coverage includes water extraction, drying, dehumidification, and structural repairs.
Flood insurance requires separate policies through the National Flood Insurance Program. Document all damage before cleanup begins.
Contact insurance companies within 24-48 hours of discovery. Failure to mitigate damage promptly reduces coverage amounts.
The speed of initial response directly determines final restoration expenses because delayed action escalates water categories and multiplies required services, making understanding restoration cost factors a critical part of emergency planning.
How Do You Document Water Damage for Insurance?
Documenting water damage requires photographing all affected areas, creating a written inventory of damaged items, and recording the water source before cleanup begins. Photograph walls, floors, ceilings, and contents from multiple angles. Capture close-ups showing water lines, staining, and material damage.
Record video walkthroughs narrating damage extent and affected rooms. Create itemized lists including purchase dates, original costs, and current values for damaged belongings. Save receipts, appraisals, and warranty documents.
Photograph the water source itself—burst pipe, leaking appliance, or roof penetration. Document timestamp and date using camera metadata or visible calendars in photos.
Insurance adjusters evaluate claims based on visual evidence quality and damage documentation completeness.
What Information Do Insurance Claims Require?
Insurance claims require date and time of damage discovery, suspected cause, photos of all affected areas, itemized damage list with values, and contact information for emergency services called. Include detailed damage descriptions room by room. Note water depth at time of discovery.
Record which areas received immediate drying attention. Provide contractor estimates for repairs. Save receipts for temporary repairs, hotel stays, or rental equipment.
Submit documentation within policy-specified timeframes, typically 60 days from damage date. Incomplete documentation delays claim processing and reduces settlement amounts.
What Is the Fastest Way to Remove Standing Water?
The fastest standing water removal method depends on volume and depth, ranging from wet/dry vacuums for minor flooding to submersible pumps for deep water exceeding 2 inches. Wet/dry shop vacuums extract water from floors with depths under 1 inch. Empty vacuum tanks every 5-10 minutes during extraction.
Submersible pumps remove water exceeding 2 inches depth at rates of 30-50 gallons per minute. Position pumps at the lowest point in flooded areas. Discharge water away from the foundation to prevent re-entry.
Mops and towels handle minimal water from small leaks affecting under 10 square feet. Rental equipment from hardware stores provides industrial capacity for moderate flooding.
Contaminated water requires disposal into sewers, not yards or storm drains where pathogens spread.
Can You Use a Regular Vacuum for Water Removal?
No, regular household vacuums are not designed for water and using them creates electrical shock risk and permanent motor damage. Standard vacuums lack water-sealed motors and drainage systems. Water destroys electrical components and creates shock hazards during operation.
Wet/dry shop vacuums feature sealed motors, water-resistant housings, and drainage valves. Rental shops provide wet/dry vacuums hourly or daily.
How Do You Start the Drying Process After Water Damage?
The drying process starts immediately after water removal by opening windows, running dehumidifiers, and positioning high-velocity fans to circulate air across all wet surfaces. Open all windows and doors to create cross-ventilation when outdoor humidity stays below 60%. Position fans at 45-degree angles toward wet walls and floors to maximize air movement across damp surfaces.
High-velocity fans dry materials 3-5 times faster than standard box fans. Place dehumidifiers in closed rooms when outdoor humidity exceeds indoor levels. Size dehumidifiers to extract 50-70 pints daily for rooms under 500 square feet.
Monitor humidity with hygrometers targeting levels below 50% to prevent mold growth. Check wall cavities and under flooring where moisture persists longer than visible surfaces. Remove and discard wet materials exceeding 24-48 hours... according to 2025 guidelines from the U.S.
Environmental Protection Agency. Moisture meters confirm when building materials return to normal levels below 15% moisture content.
How Long Should You Run Dehumidifiers After Water Damage?
Dehumidifiers run continuously for 3-7 days or until moisture meters confirm all building materials have returned to normal moisture levels below 15%. Drywall dries within 3-5 days with proper air circulation. Hardwood flooring requires 7-14 days depending on saturation depth.
Concrete and masonry dry slowest, often requiring 2-3 weeks. Check wall cavities with moisture meters where drywall appears dry but interior framing stays wet.
Electricity costs for continuous dehumidifier operation range from $30-60 per week, minimal compared to mold remediation costs exceeding $2,000-$10,000.
What Should You NOT Do After Water Damage?
The 7 critical mistakes after water damage include using electronics in wet areas, cleaning contaminated water without protection, leaving wet items together, delaying professional help, attempting ceiling repairs alone, using regular vacuums, and waiting to contact insurance.
Standing water creates electrocution risk from energized circuits and damaged equipment wiring.
Exposure without personal protective equipment risks skin and lung contact with bacteria, viruses, and chemical pathogens.
Accelerates mold growth through moisture transfer and restricted air circulation around materials.
Allows damage to worsen exponentially with each passing hour beyond the 24-hour window.
Risks collapse from water-saturated drywall and hidden structural damage above damaged areas.
Damages motors permanently and creates electrical shock hazards during water removal.
Complicates claims processing and creates coverage denial risk from delayed damage mitigation.
Avoiding these mistakes preserves safety, protects insurance eligibility, and prevents minor damage from becoming major losses.
Why Should You Not Delay Water Damage Cleanup?
Delaying water damage cleanup beyond 24-48 hours allows mold growth to begin, structural materials to weaken, and insurance companies to question mitigation efforts. Mold spores colonize wet materials within 48 hours. Wood framing absorbs moisture and loses structural strength.
Drywall disintegrates when saturation exceeds 72 hours. Metal components corrode from prolonged water exposure.
Insurance policies require reasonable mitigation efforts. Delays beyond 48 hours without valid reasons reduce claim settlement amounts.
How Fast Does Mold Grow After Water Damage?
Mold growth begins within 24-48 hours after water damage on building materials that remain wet. Mold spores exist everywhere in air and on surfaces. Moisture activates dormant spores into active growth on wet drywall, wood, insulation, and fabrics.
Visible mold colonies appear 12-21 days after initial growth begins. Mold grows on building materials that remain wet for 48-72 hours, and flooded structures contain mold-contaminated materials if not thoroughly dried within 48 hours... according to 2006 research by Mary Brandt, PhD at the Centers for Disease Control and Prevention.
The 24-48 hour drying window represents the critical period for mold prevention. Materials exceeding this saturation timeline require removal and replacement rather than simple drying.
What Conditions Cause Mold Growth After Water Damage?
Mold requires moisture, organic material, and temperatures between 40-100°F, all present in water-damaged buildings with wet drywall, wood, or insulation. Moisture above 60% relative humidity supports active mold growth. Organic building materials provide food sources for mold consumption.
Normal indoor temperatures fall within mold's growth range. Water damage creates perfect conditions by introducing moisture to organic materials at room temperature.
Prevention requires removing one condition. Moisture removal proves easiest through rapid drying within 24-48 hours after water damage occurs.
Should You Remove Drywall After Water Damage?
Yes, water-damaged drywall requires removal if it remained saturated for more than 48 hours or shows visible swelling, crumbling, or mold growth. Drywall saturated beyond 48 hours loses structural integrity and becomes mold-contaminated. Visible indicators include swelling, discoloration, crumbling, or soft spots when pressed.
Cut removal lines 12-18 inches above water damage to ensure complete moisture elimination. Insulation behind wet drywall requires removal in most cases since insulation retains moisture long after drywall surfaces dry.
Drywall replacement costs $2-4 per square foot compared to mold remediation exceeding $25-50 per square foot when growth spreads throughout wall cavities.
What Are the 3 Phases of Water Damage Recovery?
The 3 phases of water damage recovery include mitigation (stopping damage progression), remediation (removing damaged materials), and restoration (rebuilding and repairs).
Mitigation (Hours 0-24)
Emergency response to stop damage spread through water source shutoff, initial extraction, and temporary protection measures.
Remediation (Days 1-7)
Water removal completion, structural drying, damage assessment, mold prevention, and contaminated material disposal.
Restoration (Days 7+)
Repair damaged structures, rebuild removed materials, replace destroyed belongings, and return property to pre-loss condition.
Phase duration varies by damage extent, water category, and structural complexity. Minor damage completes all phases within 2 weeks. Major flooding extends restoration to 4-8 weeks.
How Long Does Each Water Damage Recovery Phase Take?
Mitigation takes 1-3 days, remediation requires 3-7 days for drying and assessment, while restoration timelines vary from 1 week to several months depending on damage severity. Mitigation duration depends on water volume and source complexity. Remediation extends when humidity levels remain high or hidden moisture persists in wall cavities.
Restoration timelines depend on material availability, contractor schedules, and insurance approval processes. Contaminated water increases all phase durations by 50-100% compared to clean water damage.
What Types of Water Damage Require Different Responses?
Water damage responses vary by contamination category, with clean water requiring standard drying, gray water needing disinfection, and black water demanding professional hazmat protocols. Category 1 clean water originates from supply lines, broken pipes, or rainwater. Standard drying and sanitization methods suffice for clean water damage.
Category 2 gray water comes from appliances, toilet overflows (urine only), or washing machines. Gray water contains bacteria requiring disinfection with antimicrobial treatments during cleanup. Category 3 black water includes sewage backups, flooding from rivers or lakes, and toilet overflows containing feces.
Black water contains pathogens like E. coli, hepatitis, and parasites requiring professional hazmat handling. Personal protective equipment requirements increase with contamination category. Homeowners safely handle Category 1 water.
Category 2 requires gloves, eye protection, and respirators. Category 3 demands professional-grade hazmat suits and disposal protocols.
Can You Clean Up Black Water Damage Yourself?
No, black water damage from sewage or flooding contains pathogens and requires professional restoration with hazmat certification. Black water carries E. coli, hepatitis A, cholera, and parasitic organisms causing severe illness. Exposure through skin contact, inhalation, or ingestion creates immediate health risks.
Professional restoration uses protective equipment including full-body suits, respirators, and sealed boots. Specialized antimicrobial treatments kill pathogens that household cleaners cannot eliminate.
Contaminated materials require disposal in approved facilities, not standard trash collection.
What Is the Most Important Thing to Remember After Water Damage?
The most important principle after water damage is taking immediate action within the first 24 hours to ensure safety, stop water flow, and begin drying. The complete response sequence starts with electrical safety verification and evacuation assessment. Shutting off the water source prevents damage from multiplying while initial response occurs.
Documentation before cleanup preserves insurance claim eligibility and settlement values. Standing water removal within hours prevents saturation from spreading to additional materials. Drying initiation within 24 hours stops mold growth before colonization begins.
Professional assessment determines when DIY efforts prove insufficient for damage extent or contamination level. The 24-48 hour critical window determines whether water damage remains manageable or becomes catastrophic.
Fast, systematic action following safety priorities, source control, documentation, extraction, and drying prevents permanent damage to structures and belongings.
Related Articles
Ready to Get Started?
Get professional services in today. Call now for immediate assistance or get a free quote.
Professional Service
Trusted experts in your area
Quick Response
Fast and reliable service
Fully Licensed
Certified and insured professionals